Recipes

Sauerkraut 101
by Joey O’Hare
6min read
If you’ve visited the allplants instagram feed lately, you might have caught one of our instagram live cook-alongs which we’ve kicked off with a 4-part series on fermented foods.
And whilst "fermented" and "bacteria" might not necessarily be top of your ingredient list, bear with us. Not only are fermented foods a delicious addition to your fridge (great as a finishing touch on pretty much every meal), they also have a whole host of gut health benefits.
What is sauerkraut?
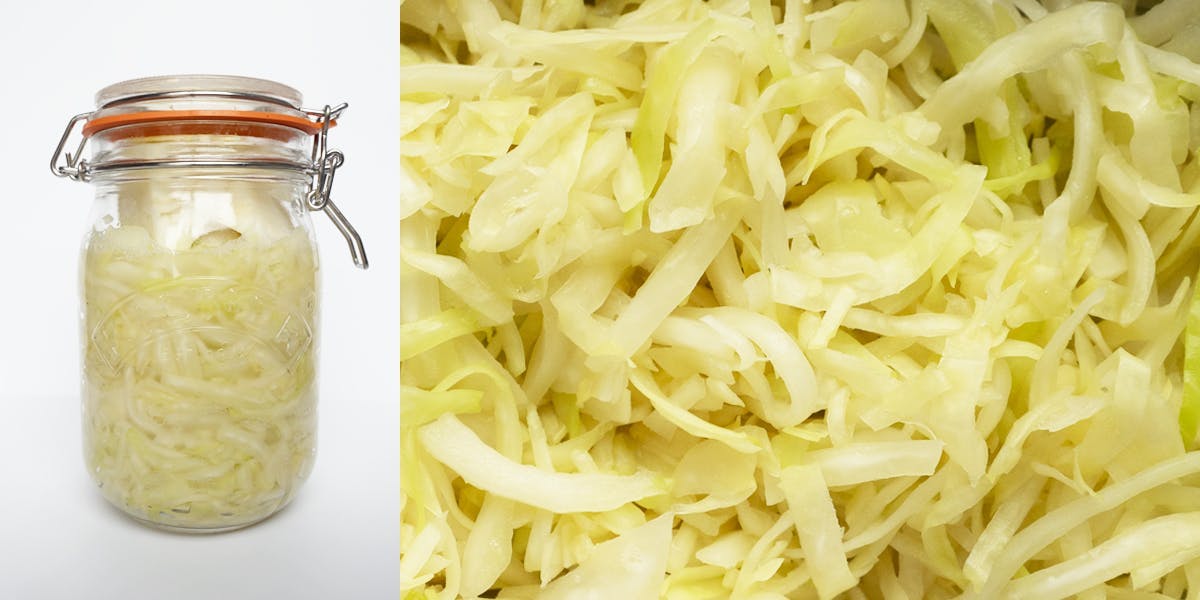
In a nutshell, sauerkraut is fermented cabbage. It contains only shredded cabbage and salt (and millions of lactic acid bacteria!). It’s a tangy, savoury condiment with huge versatility. It’s as old as time; before refrigeration fermen
ting was used to preserve vegetables throughout the year.
Sauerkraut is the most classic example of the 'dry-salt' method of fermentation and a brilliant place to start if you are new to fermenting. You can follow a very simple ratio rather than a complicated recipe, and the process is straight-forward, even therapeutic!
How do I eat sauerkraut?
There are so many ways to eat sauerkraut! Admittedly I am crazy for fermented foods, but I struggle to think of a dish Kraut doesn’t go with. The power duo of salt and acidity naturally dial up flavour, and adding a spoon of kraut to your food does just that.
Try a spoonful on top of dhals, curries, stews and tofu-fried rice. I love this on a rich and earthy Beetroot Dhal, such as this recipe from my personal blog, Food with Time.
Ready to get creative? You can add different spices to your kraut each time, or even a combination of different vegetables (providing at least 50% of the weight is still cabbage). Carraway seeds are a classic in a white cabbage sauerkraut. I love adding a teaspoon of turmeric powder to give the kraut a golden yellow colour and earthy note, and a few grated carrots bring a lovely natural sweetness.
If you want to get everything ready and cook along with me head to allplants IGTV - let us know how you get on by tagging @allplants!
Prep Time
15mins
Leave Time
10-14 days
Serves
16+
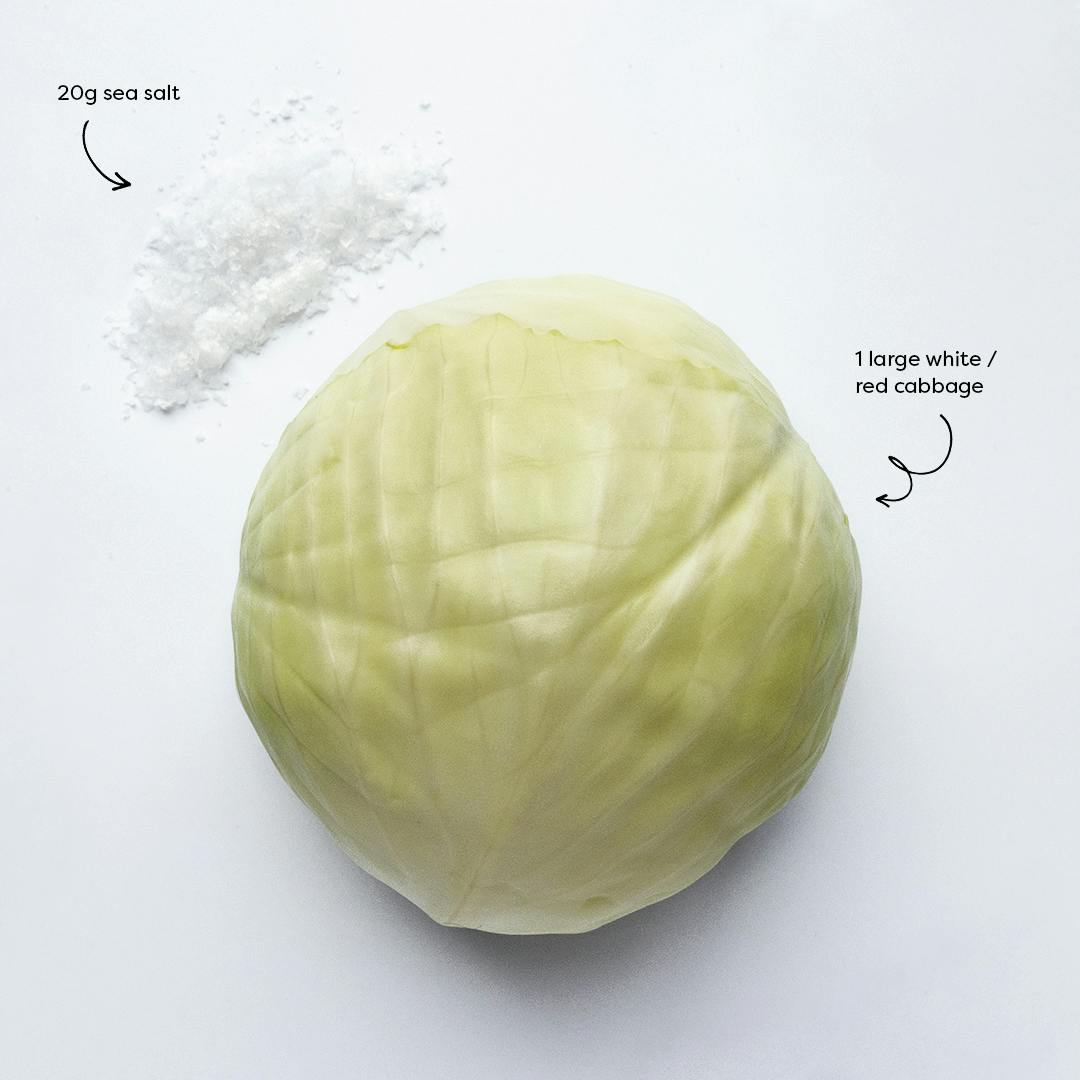
Ingredients
1 Large Cabbage (either white or red is fine, but not a Savoy Cabbage)
20g Flakey Sea Salt
Method
STEP 1
Work clean! Wash your hands, cabbage, chopping board and knife really well. It’s key that no harmful bacteria get involved from the beginning.
STEP 2
Sterilise your 1 litre flip-top container. Preheat the oven to 140 degrees, then wash and rinse your jar (i.e., Kilner jar). Remove the rubber seal, then pop the open jar in the oven for 10 minutes.
STEP 3
Prepare your cabbage. Cut off the base of the cabbage and keep this to one side, it will become crucial later. Peel off and throw away the 2 external leaves.
STEP 4
Shred your cabbage. Quarter the cabbage, cut away the hard central core holding on to these offcuts, as they will be handy later! Use your sharpest knife to shred the cabbage finely, approximately 2mm thick if possible.
STEP 5
Weigh your cabbage. Typically 1 large cabbage yields 1 kg of shredded cabbage which makes the maths nice and simple.
STEP 6
Add salt. We use a ratio of 2% here; this means 20g of salt to 1 kg of shredded cabbage. Sprinkle the salt over the cabbage in your largest mixing bowl.
STEP 7
Scrunch! Roll up your sleeves and get stuck in. Slow, strong and steady works best here! As the cabbage bruises it will become soft, and release approximately 1 cup of water. This should take about 10 minutes.
STEP 8
Pack your jar. Gradually transfer your cabbage into the sterilised jar, compressing it as you go to remove any air pockets. This creates an anaerobic environment in which the healthy bacteria can thrive.
STEP 9
Keep cabbage submerged. Once the jar is full and compressed, pour over any excess liquid left in the mixing bowl. Wipe away any exposed bits of cabbage that are poking above the water line.
STEP 10
Make a cabbage butt bung! Find the base of the cabbage from earlier and give it a good rinse. Trim this until it fits neatly in the neck of the jar. This will act as a ‘bung’ and will help to keep things in place. If you need a little extra height to fully compress the cabbage use a bit of the central core as well.
STEP 11
Allow fermentation to kick in! Stand the jar in a bowl, and leave it at room temperature for 10-14 days before eating. Keep it away from central heating and out of direct sunlight too. It’s super important to ‘burp’ your jar each day to allow the carbon dioxide to escape; CO2 is a natural byproduct of fermentation and if too much pressure builds inside the jar there’s a risk of a ‘bang’, so do not forget this crucial step!
STEP 12
Taste and enjoy! After 10-14 days, your cabbage should be pleasantly tangy and super tasty! Now it’s ready to be popped in the fridge where it will last for up to 2 months. Use a clean spoon each time you take some, and scrape down any stray bits of cabbage from the side of the jar.
By Joey O’Hare
Joey is our Head of Food Development, running our dishes’ journeys from ideation to launch. (With lots of taste-testing in between). When she’s not cooking up a storm in our kitchen, she’s doing so in hers. After a trip to the local farmers market of course, for seasonal veg, and her swear-by-staples – extra virgin olive oil, Maldon sea salt and lemons.
Let us take care of dinner
After getting creative in the kitchen, give yourself the weekend off by letting us take care of dinner. Check out our delicious meals here.
Shop now


